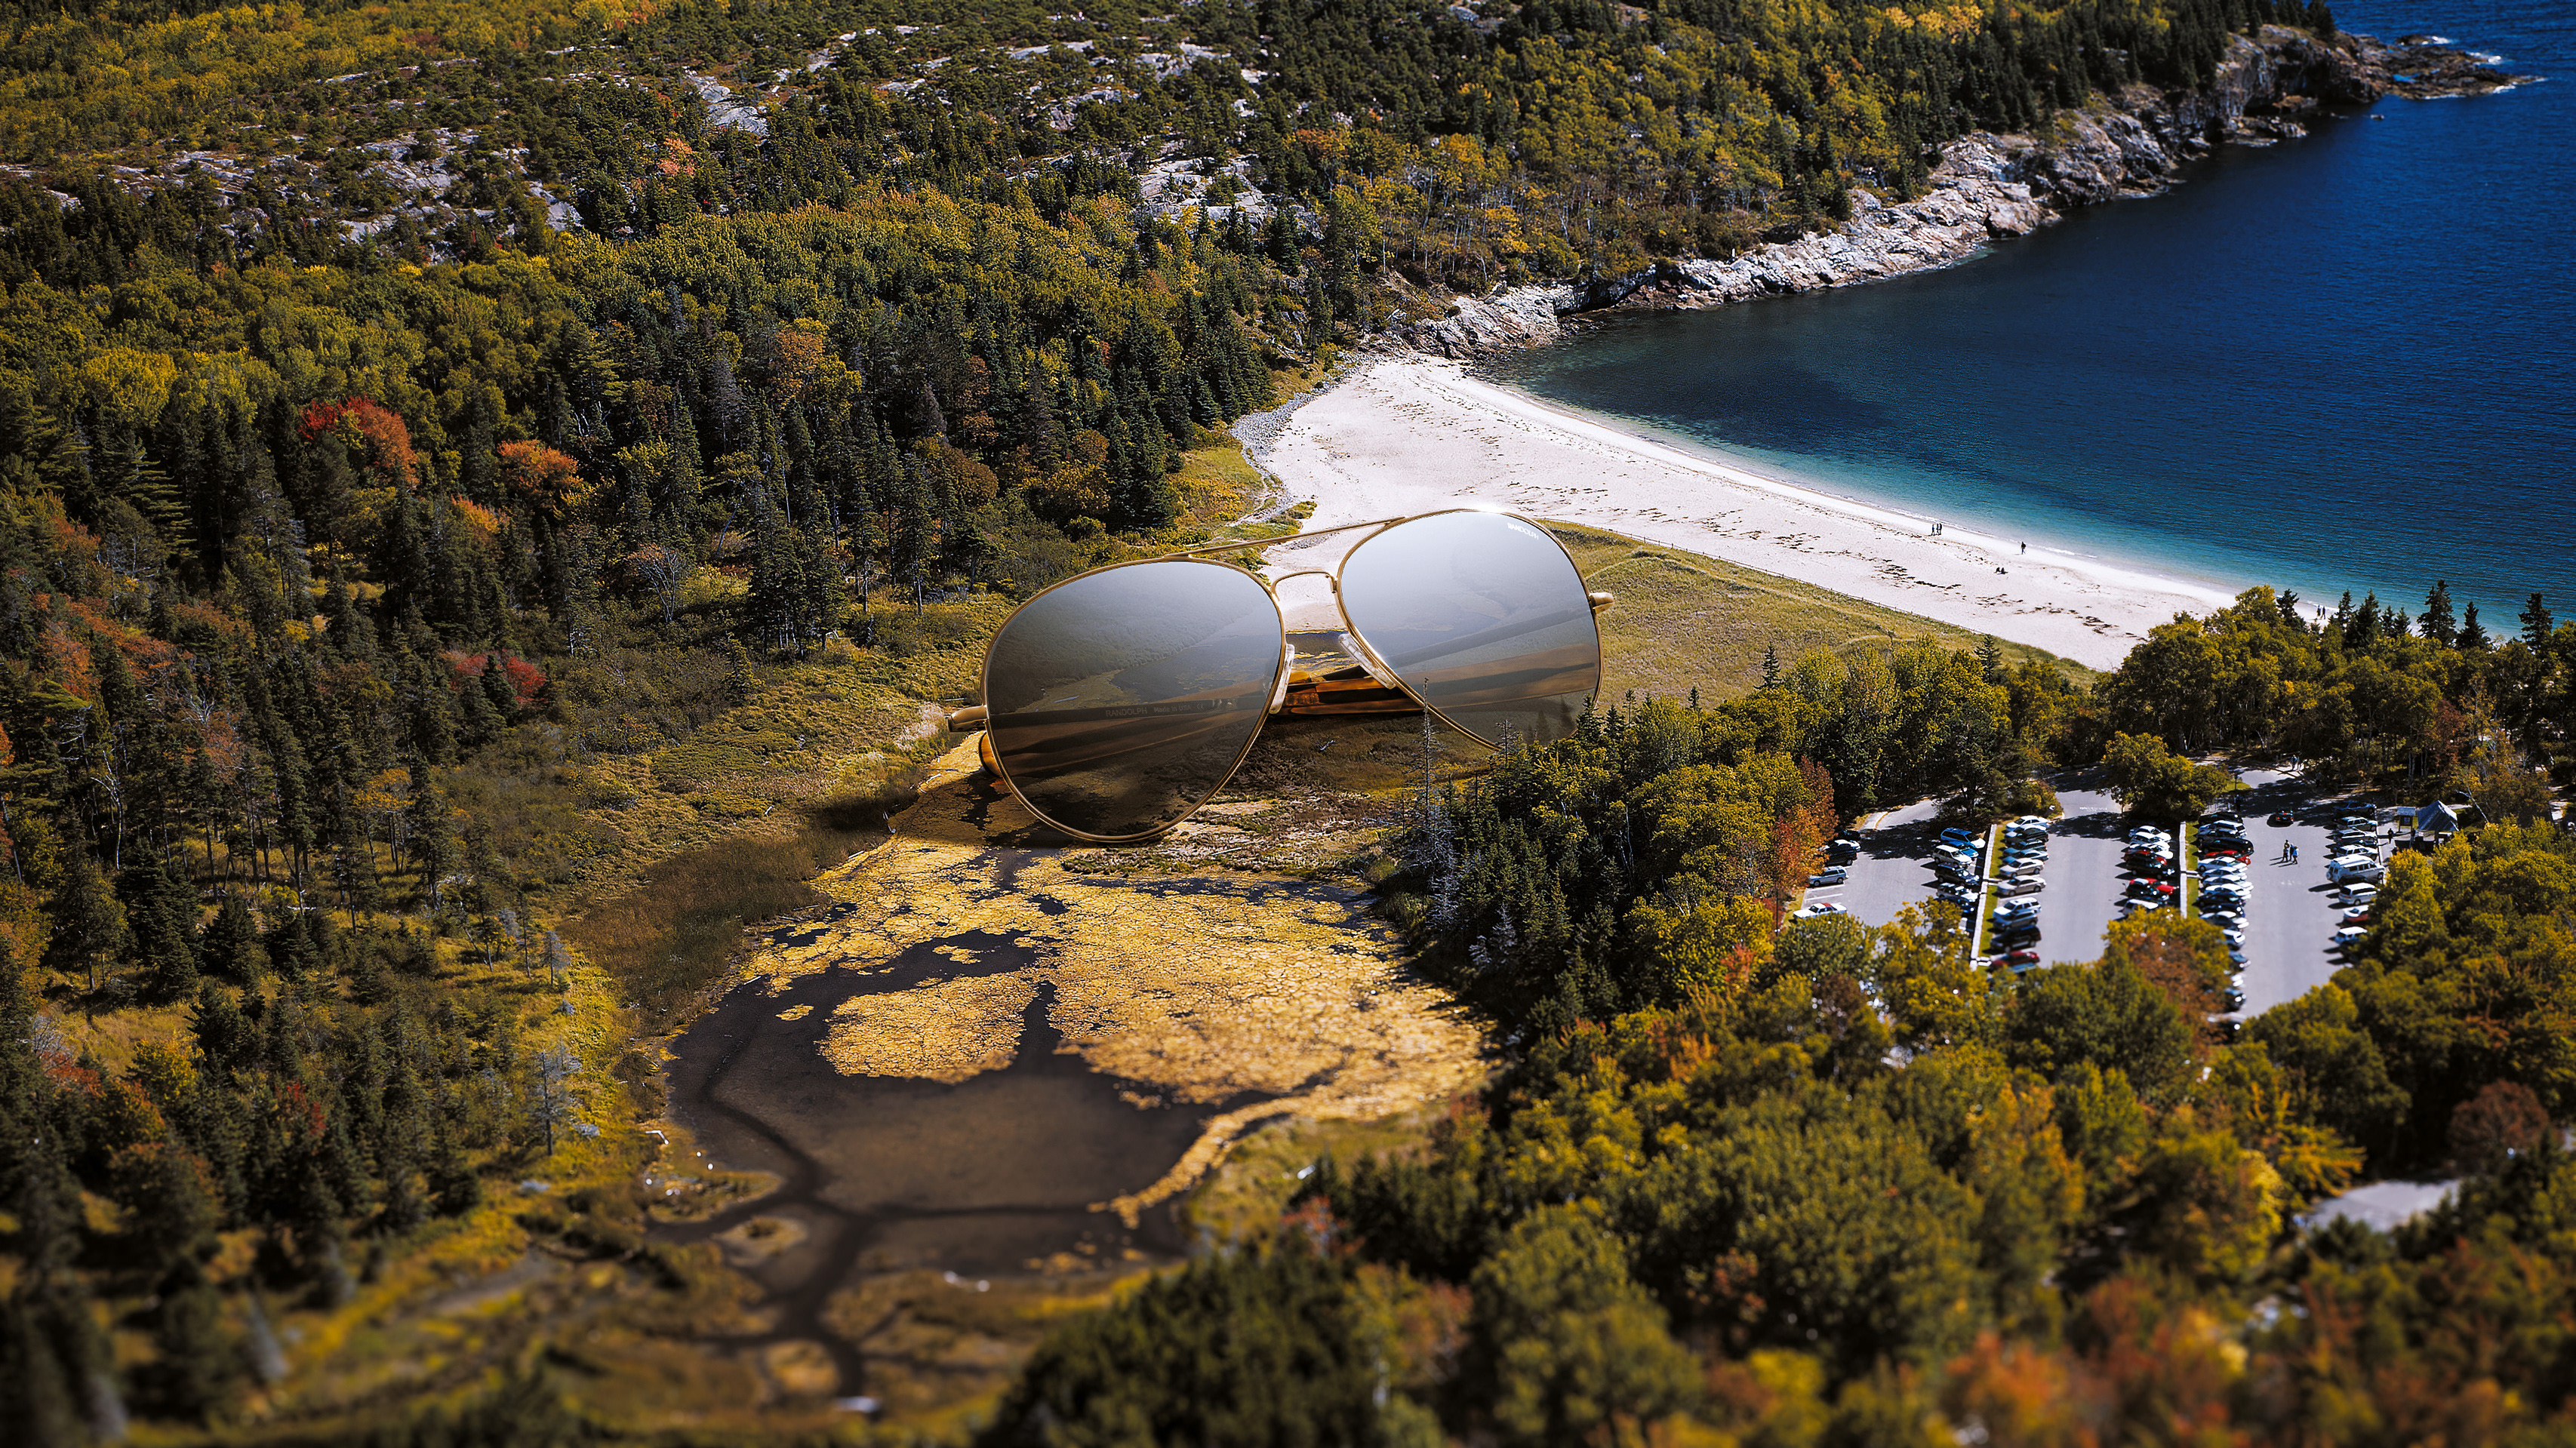
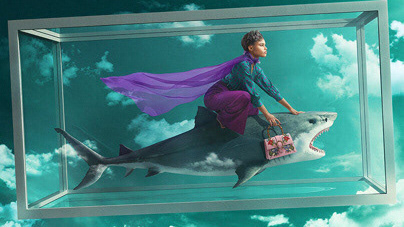
Animal Lover
This another awesome piece done for Sagmeister & Walsh, NYC back in early 2018. It is indeed a very cool concept and needless to say a little complex to pull off.
I was in charge of the whole post-production process which included photo retouching, composite & integration, color correction and grading. There are approximately 20-30 hours of intensive Photoshop work over several days on this single piece alone. I’m pretty happy with the result, so let me tell you how I did it.
The source material
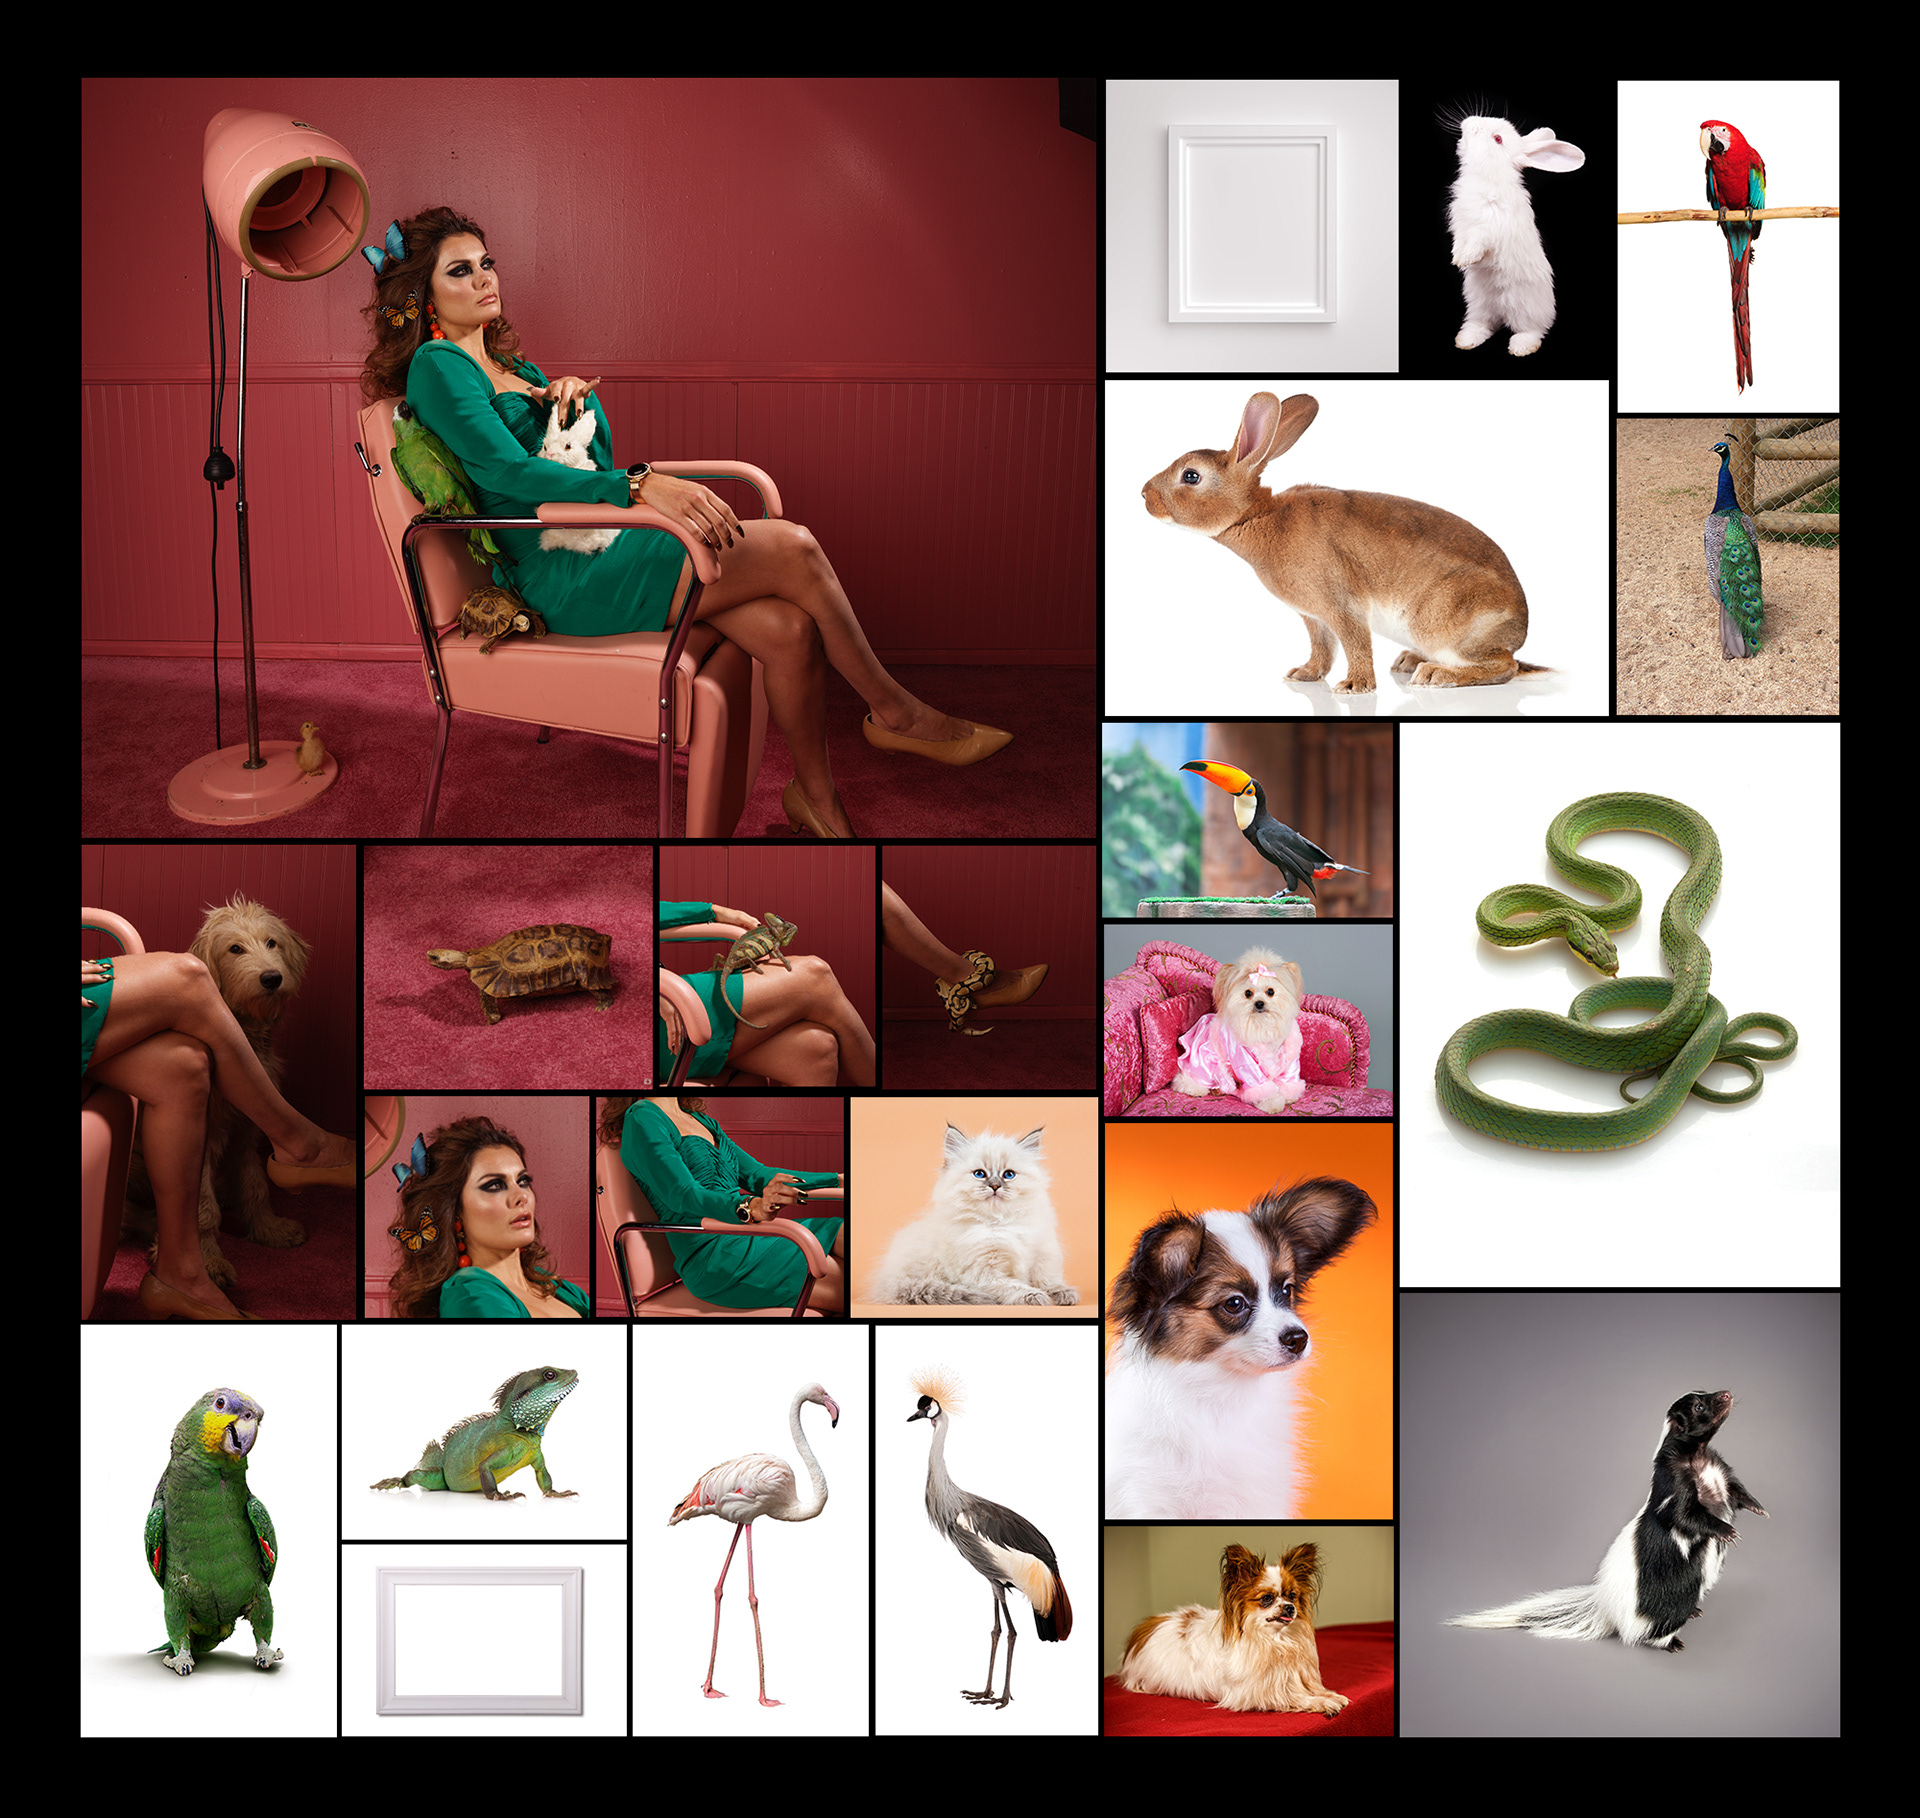
As you can see the source material for the composite was abundant. It started with many shots from a special photoshoot on a rather simple yet very well designed set with a model, a few props and some of the animals you see in the final image.
The shots were taken with a Phase One medium format camera.
All the shots sent to me I processed them in RAW, 16 bits using Capture One software.
Just so you know, the girl is not a simple frame from the photoshoot. It is a composite made out of many frames of her. One for the body, one for a different face, different hands, different legs. You know, it is a beautiful “Frankenstein retouching job” but you can’t really tell. Which is exactly the point!
Some of the animals on set were alive and posed along side the model in a very fashionable manner. Others were props to be replaced later.
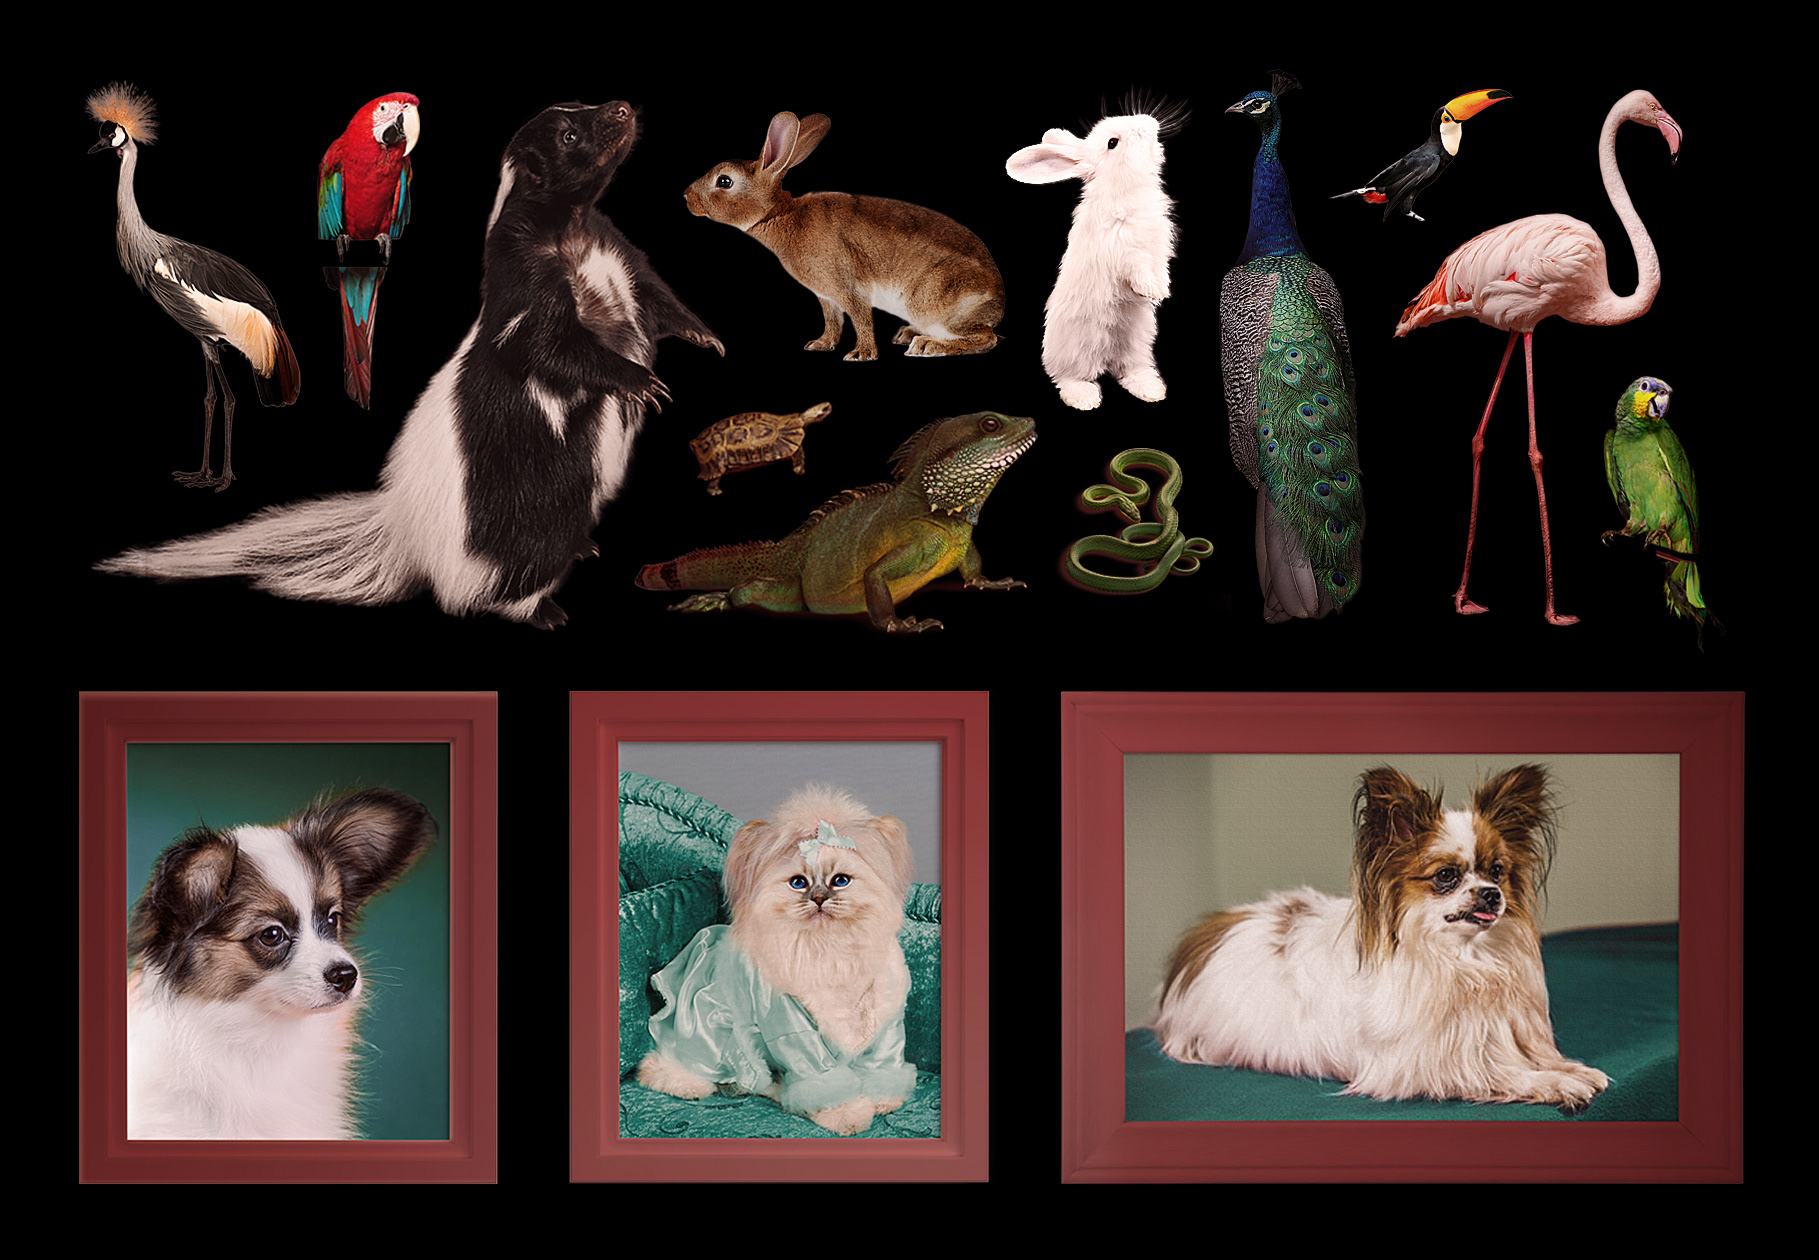
Many of the animals that filled the scene came from stock photography which impose the hard challenge of making them all fit naturally in the scene despite having all very different lighting configurations than the one used in the photoshoot.
Prep Work
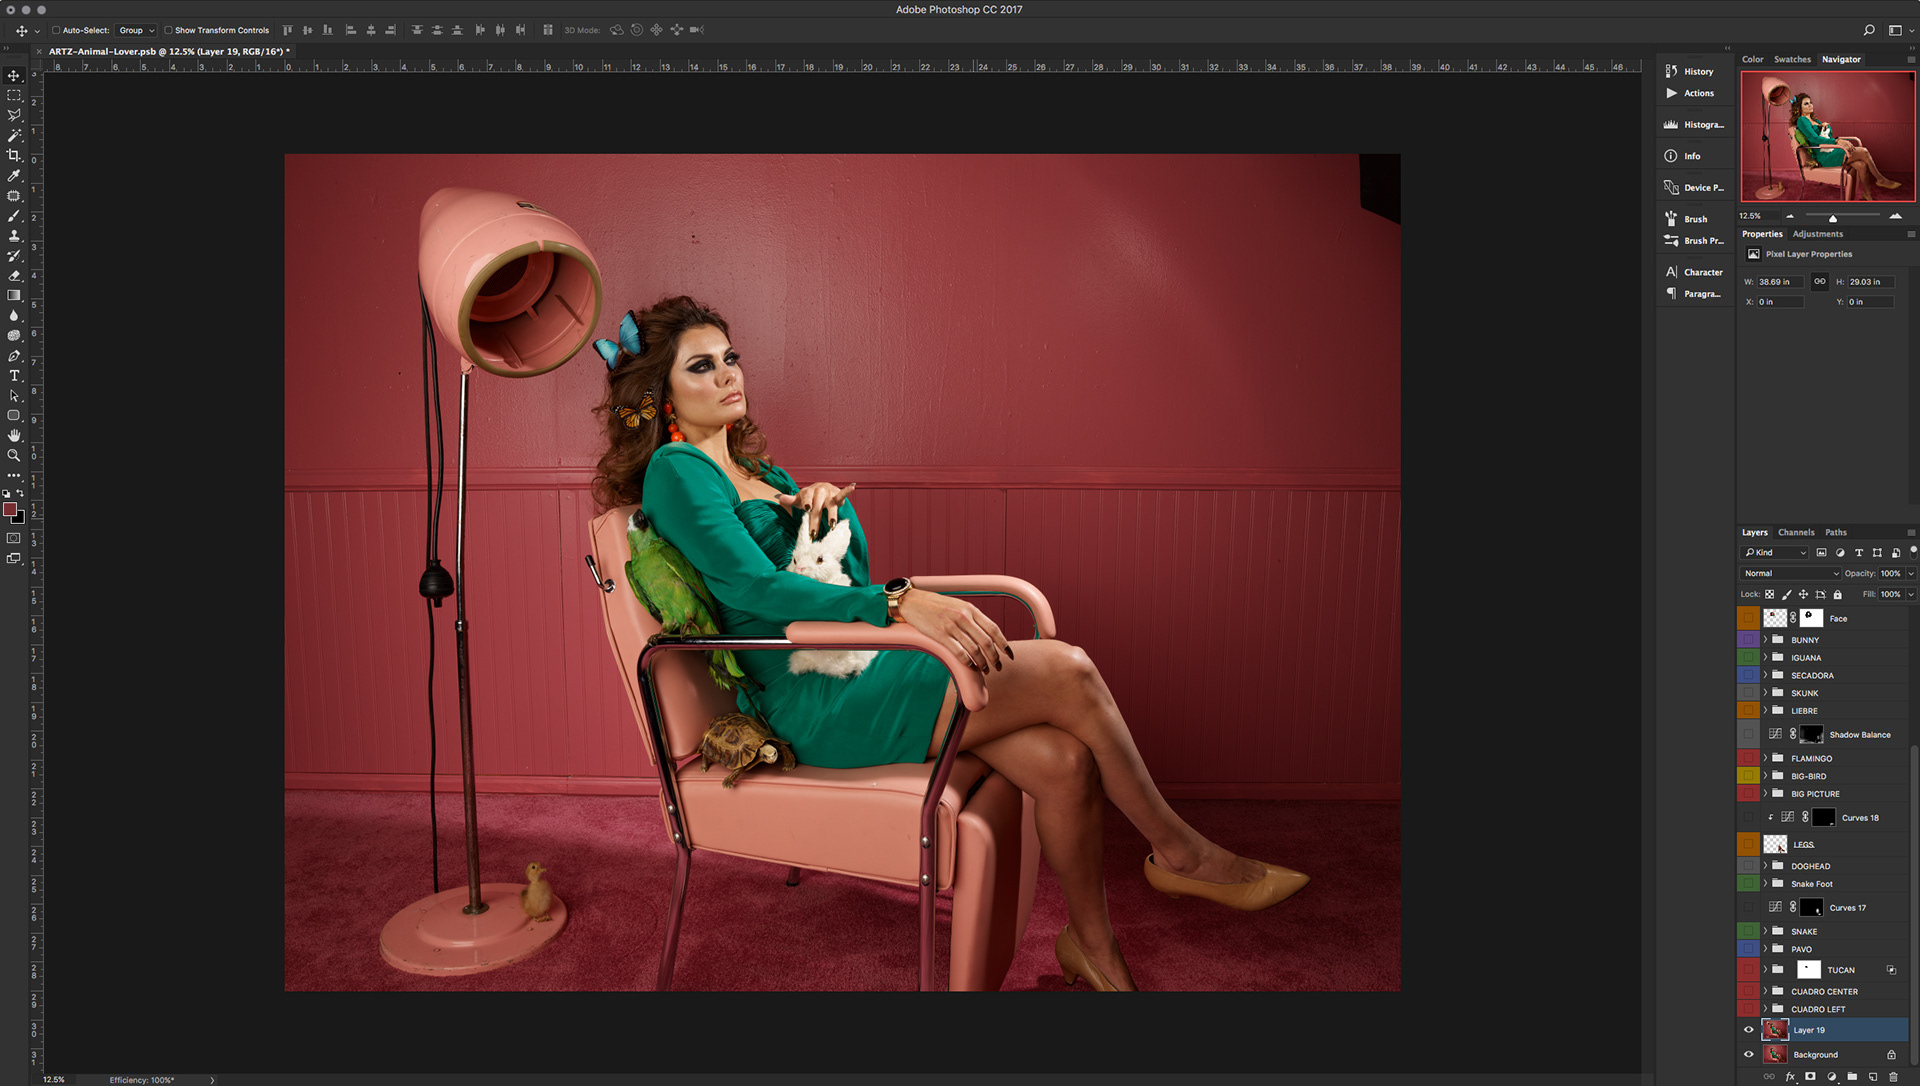
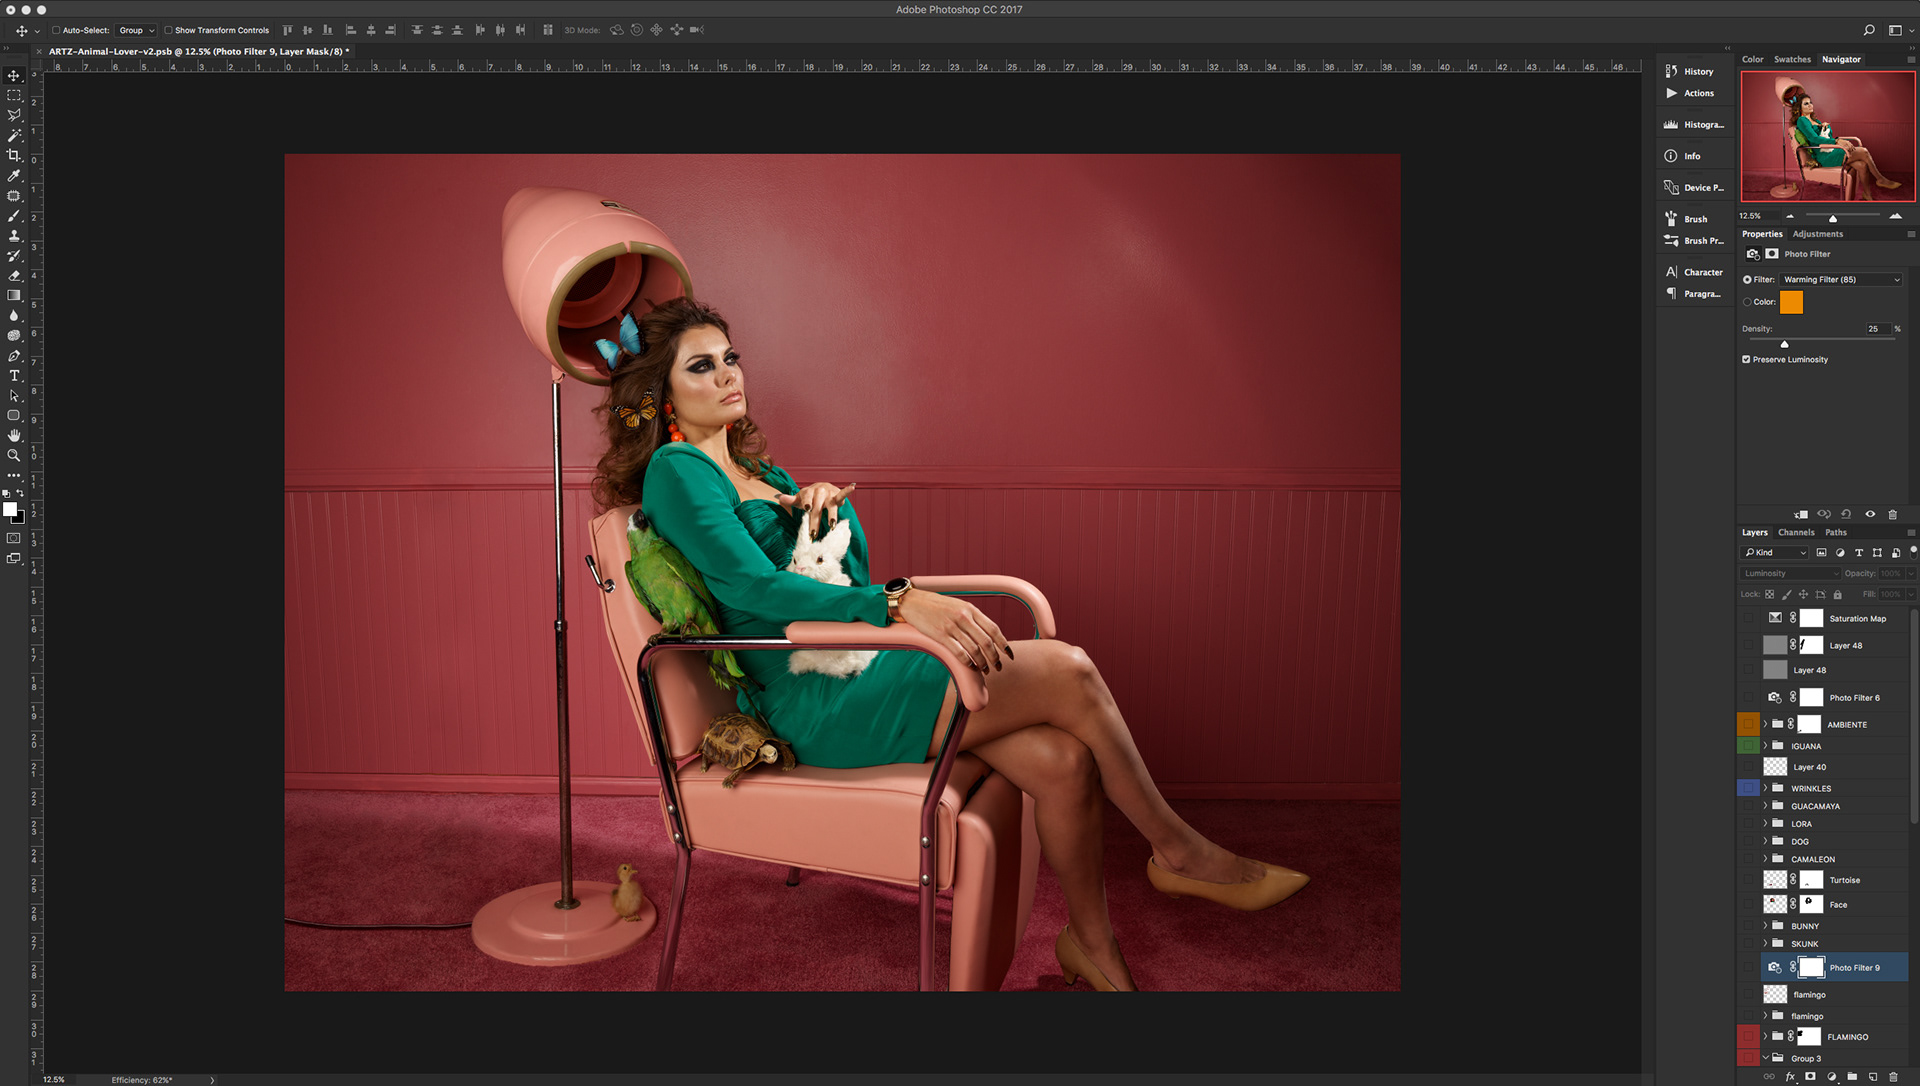
Before I started working on the final composite there was a lot of prep work to be done. Most of the animals needed to be masked out and retouched beforehand in order to be placed within the main scene later. The mayority of the integration, shadows and color grading work done in the final composite.
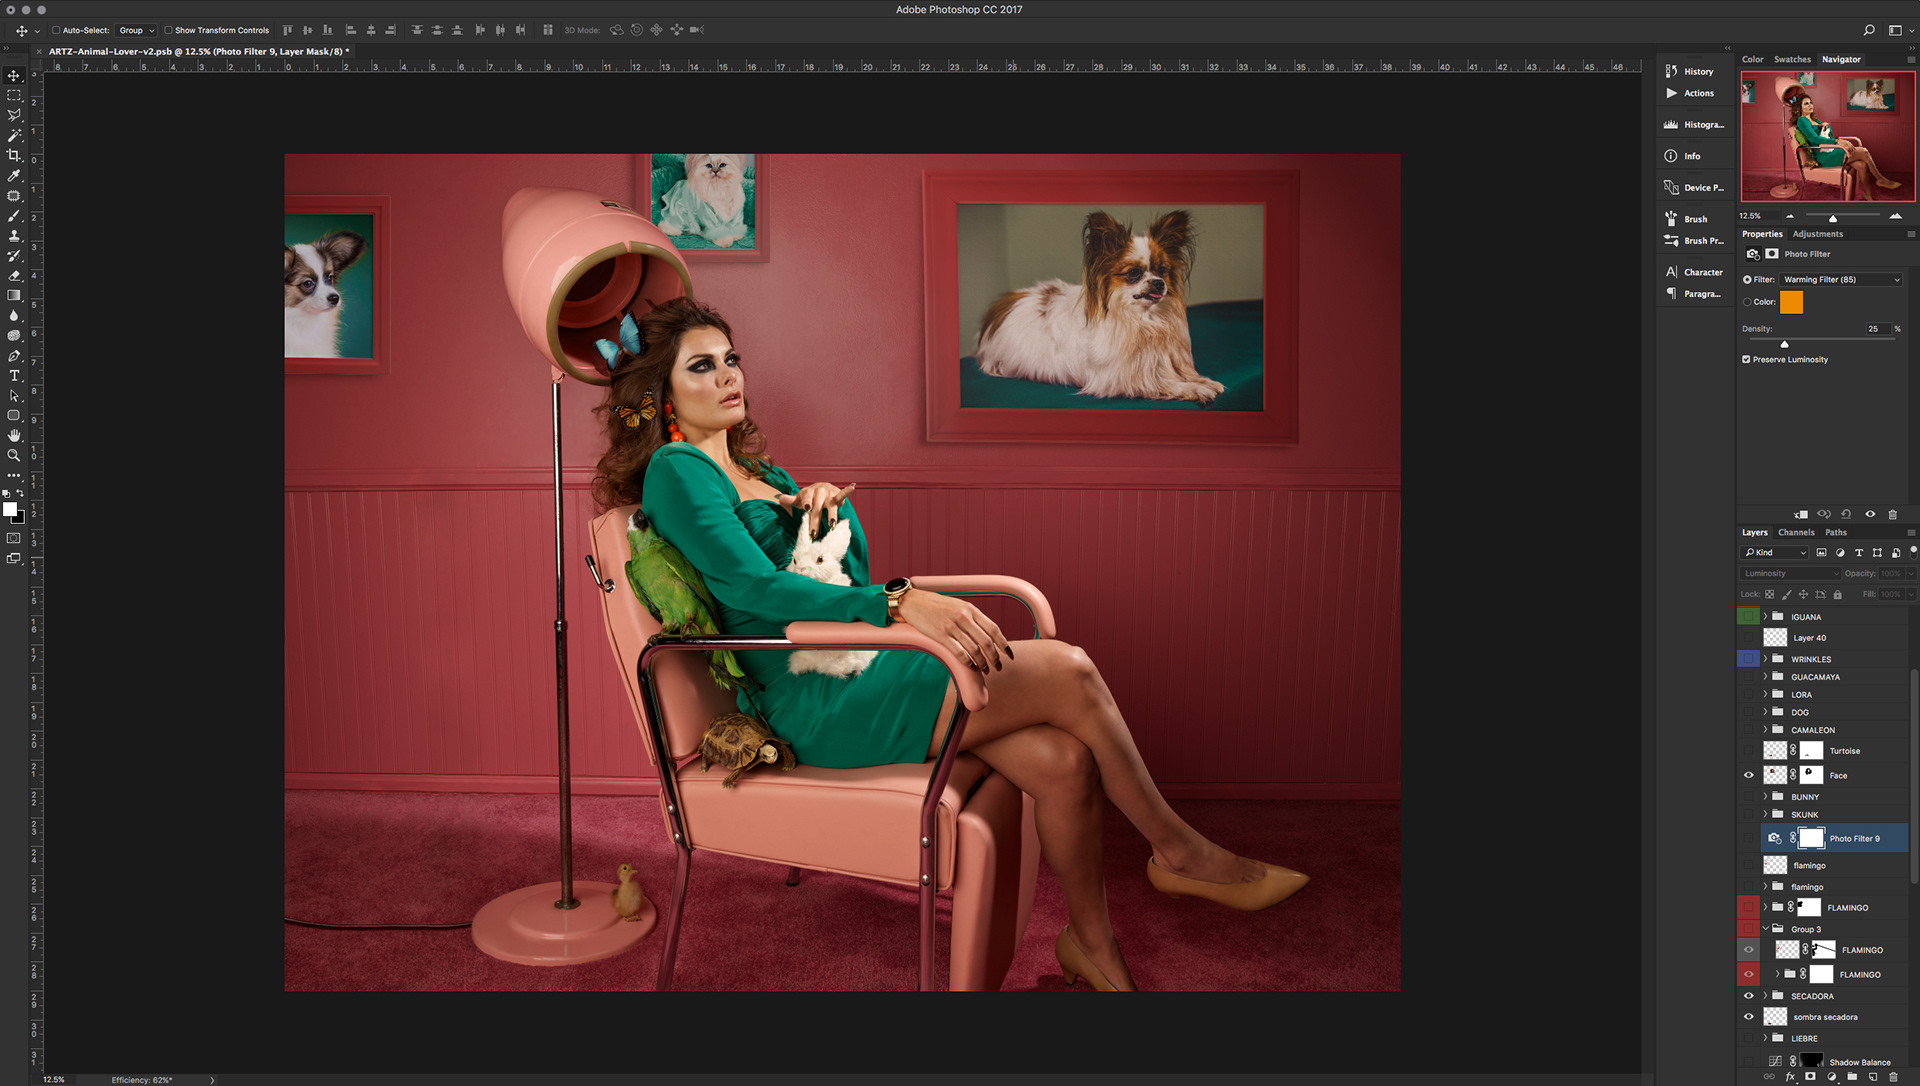
I also did the composites for the framed pets separately. I sampled the colors of the main wall of the set so I could paint the originally white frames accurately in regards of the main light source and their placement on the wall.
Cleaning Things Up
I started by isolating the main subject and cleaning everything up. There is obviously a huge amount of imperfections everywhere: in the wall, the carpet, the girl’s skin, her shoes are wrinkled, etc. It is mostly spot healing brush and clone stamp work. I used frequency separation for her face, hands and legs.
Yes, it is A LOT of work but I had to take care of these things so I have a clean foundation before adding new elements to the scene. Every composition job should start this way otherwise imperfections will be accentuated later on.
Once I finished the touch ups to the main scene and subject I masked out the hair dryer since we needed to move it closer to the girl and also we had to get rid of the hanging cables and replace them with a simpler more elegant solution.
I went for one simple cable coming out the dryer’s base going out of frame. It is probably less realistic but it looks cleaner and less intrusive. It just looks better. I also straighten up the hair dryer’s pole.
Filling The Scene
Now we can start doing the heavy and intensive composite and integration work. Like replacing the model’s face and placing the photo frames on the wall matching the lighting of the scene.
Since I took care of the background completely I did some light color correcting and grading to the general scene so the process of integration of all the animals is smoother. Lots of curves, dodge & burn, shadows & highlights work. Several light wraps for each animal. I used a saturation map to guide me through the entire composite.
After the face of the model I replaced the white prop bunny for the stock photo one as well as the green parrot. Then I added the macaw, the chamaleon, both snakes, the dog and the little tortoise. Basically worked on all the animals closer to the girl first. The ones interacting with her directly.

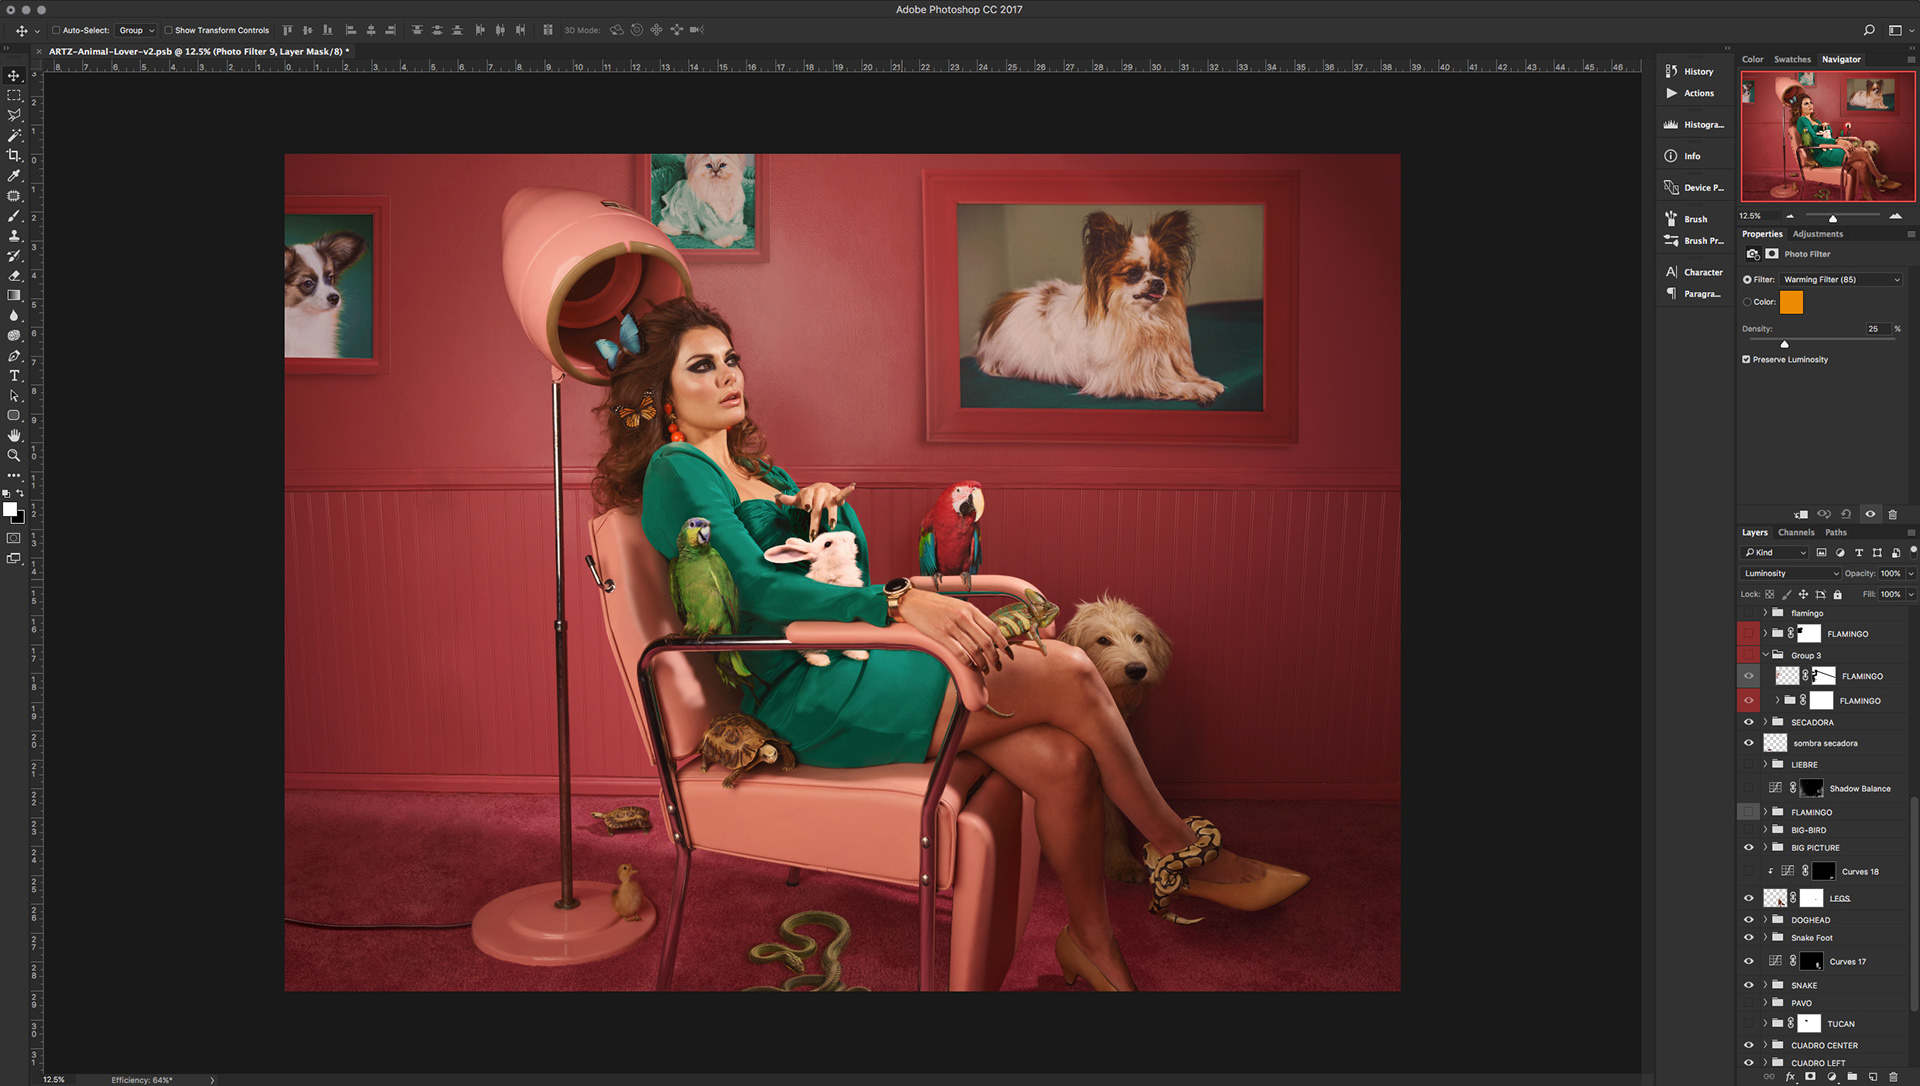
Then I added the toucan on her shoulder, the peacock and the skunk. Here is where it starts to get tricky since all of those have very different lighting. They are placed in different parts of the scene so the main light source affects them with different intensity. You also have to be aware of this and work carefully on the shadows they cast on the scene.
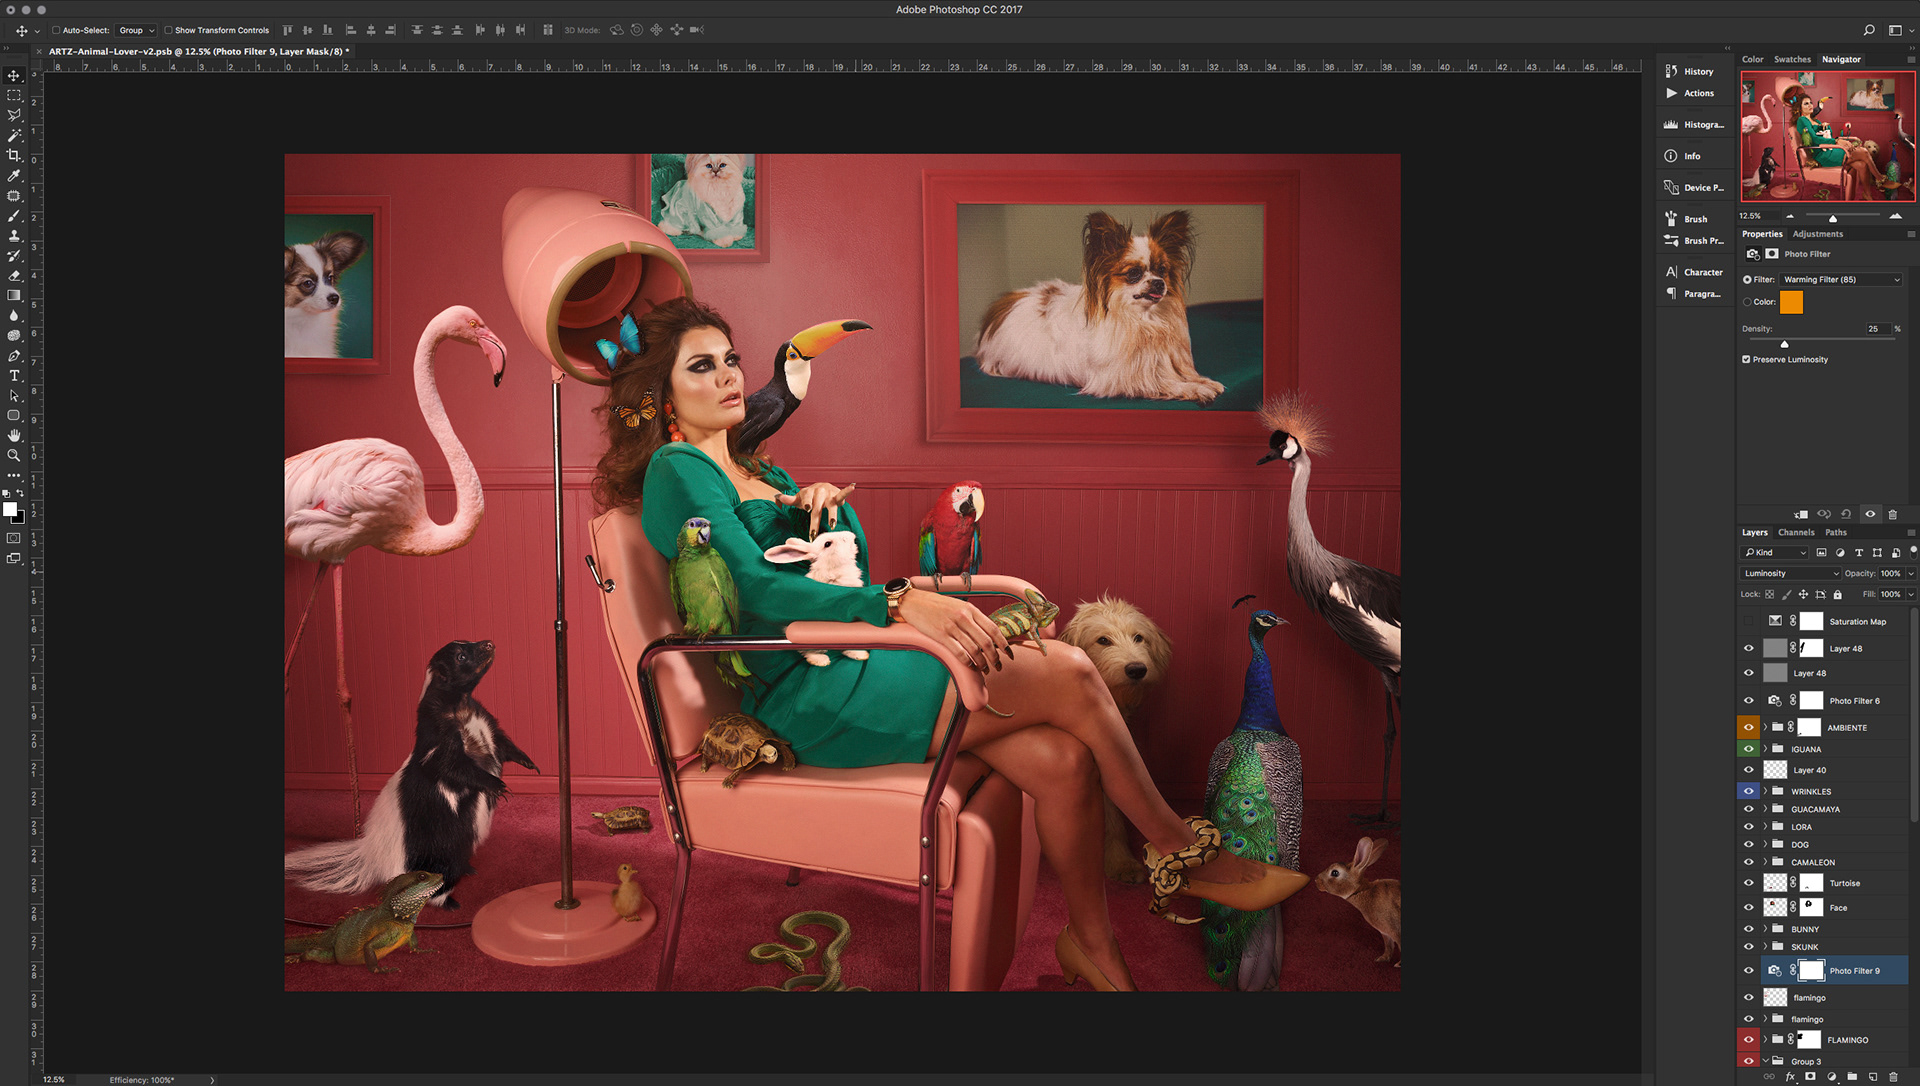
Same thing applies to the remaining animals on the scene.I finished the composite by adding the flamingo, the iguana, the hare and the big bird on the right. Lastly I did some minor color grading adjustments and applied a high-pass filter in order to sharpen things up overall.
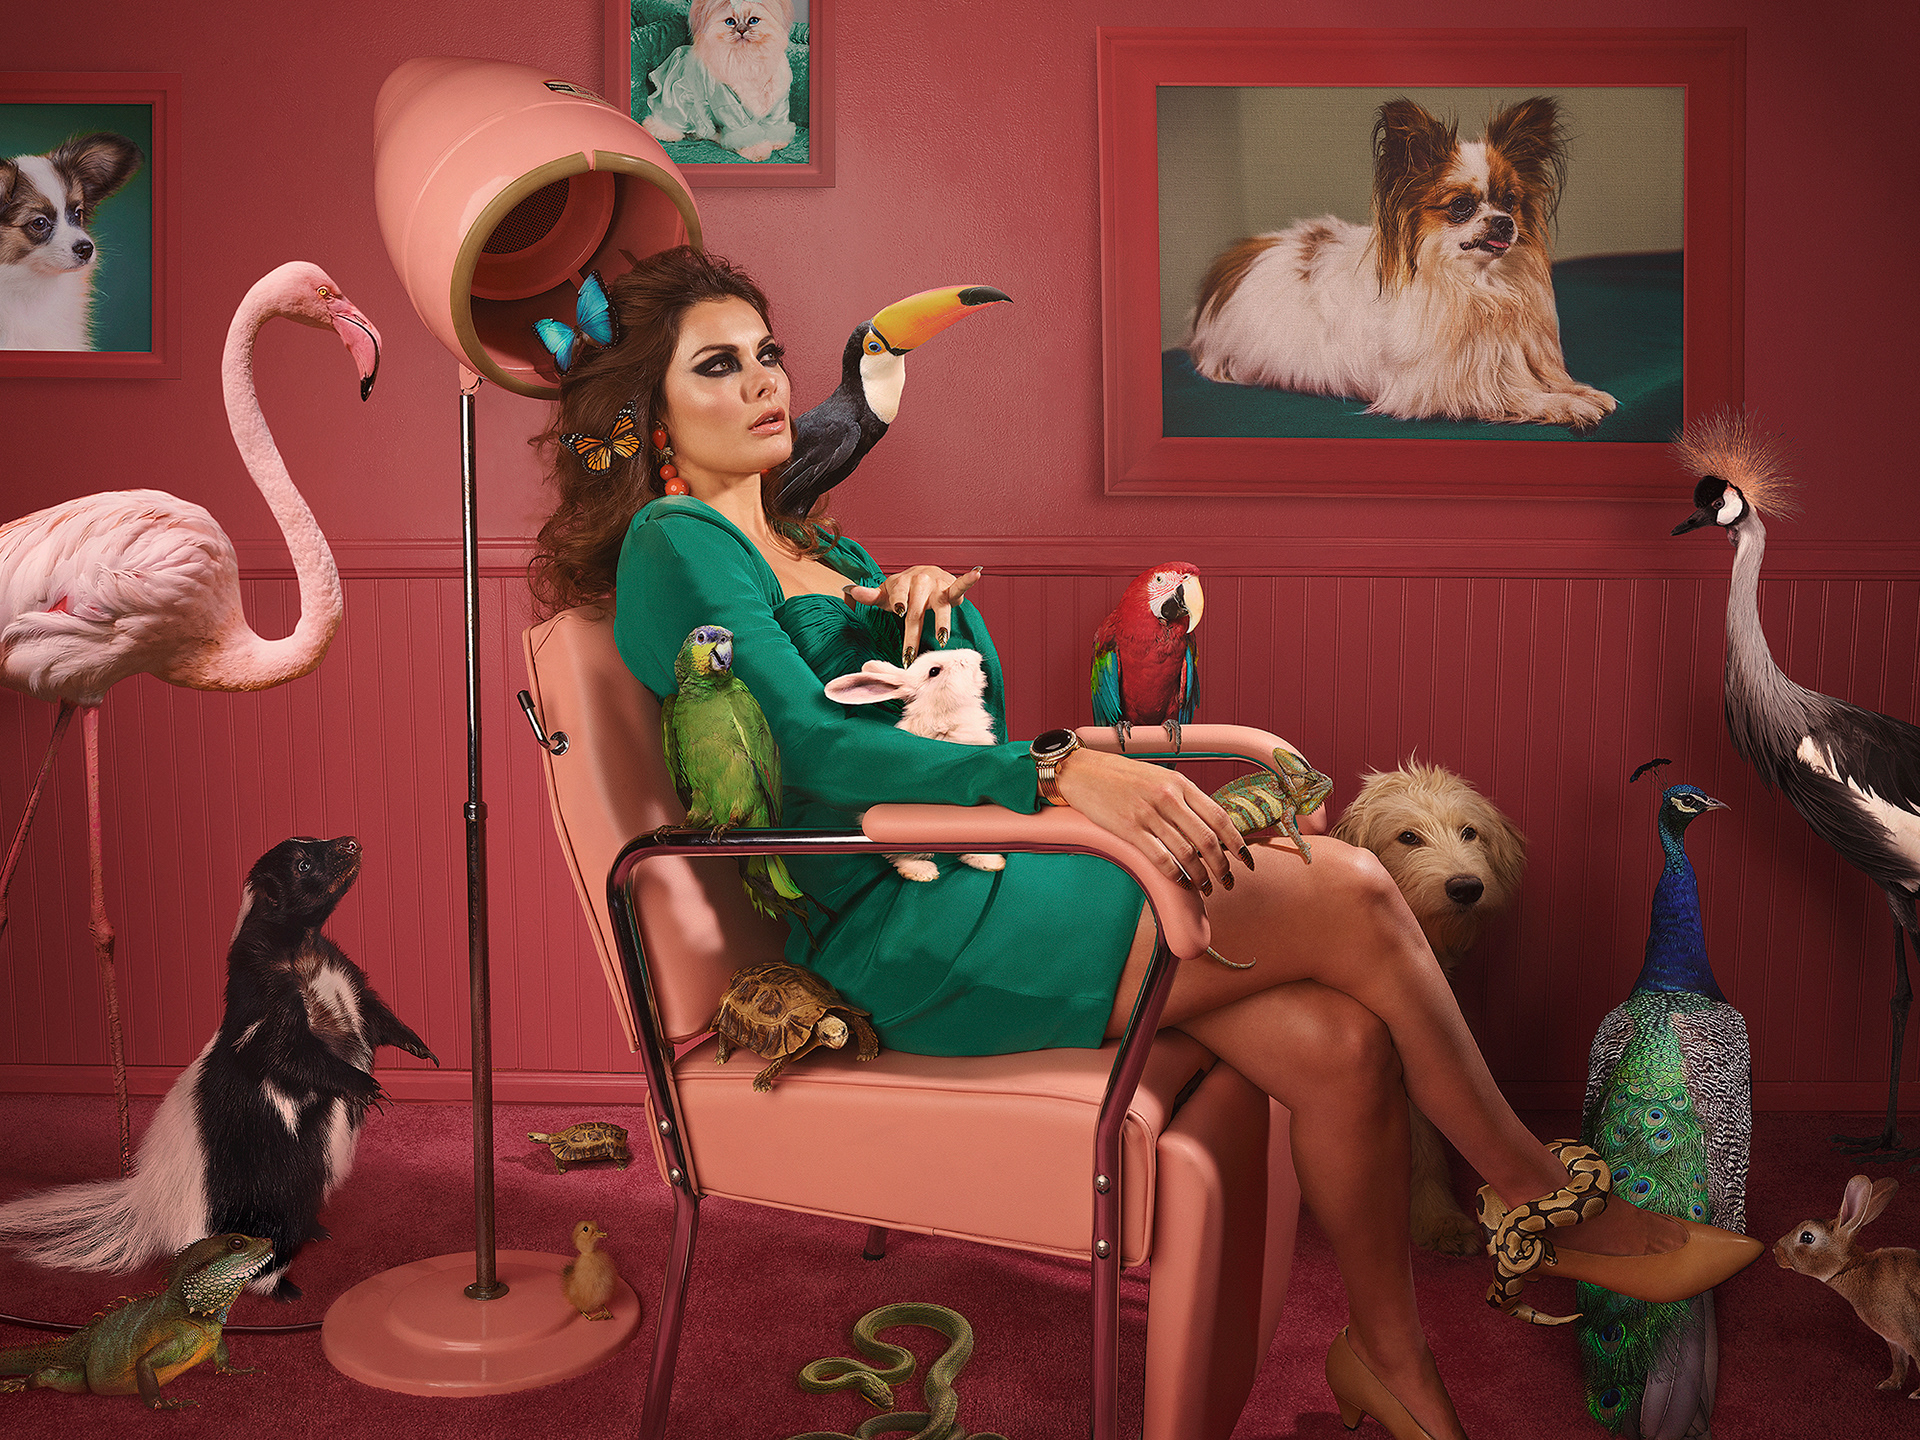
That’s it, the Animal Lover piece was done!
THANK YOU FOR YOUR INTEREST IN THE PROCESS.
MAIN CAMPAIGN CREDITS
Agency/Studio: Sagmeister & Walsh, 2018 Creative Direction: Jessica Walsh Production: Brande Bytheway Production Support: Natalia Brown & Nasir Kenneth Ferebee S&W Production: Erica Grubman Main Campaign Photography: Zak Mulligan Post Production: Carlos Jiménez Photography Assistants: Andre Roque, David Lopez & Brant Beland Digital Imaging: Logan Bingham Additional Photography: Sarah Hopp Production Design: Brittany Porter Production Design Assistant: Daniel Mutton Art Direction: Zachary Friedman Art Assistance: Anna Humphries & Emily Beard Prop Styling: Sarah Holmes & Arielle Casale Hair Styling: Rachel Lee Make Up: Jaime Diaz Make Up Assistance: Armando Garcia Design: Gabriela Namie, Rachel Denti, Matteo Giuseppe Pani, Ryan Haskins, Felipe Rocha, Fumi Omori, Julia, Chen Yu, Angela Iannarelli, Emily Simms Nail Art: Yoko Sakakura Wardrobe Styling: Amelian Kashiro-hamilton Styling Assistance: Karen Veliz, Gibby Evan, Niko Karamyan & Kristina Garret Set - Production Assistance:Andy Faulkner, Michael Caravajal & Bruce Bundy Animation:Yaya Xu